

AND NO, I had NEVER built anything before. :) I have refinished and painted old furniture before, but I have never BUILT furniture. I have add these steps and what I learned in this process so you can build your own. :)
My personality is the color orange, many of you in education have heard the color personalities before. I get an idea and dive right into it, and THEN I figure out how to complete the task. :) I did hit a few bumps in this road. That is why I am writing this post. Reading this will help you have an easier road ahead of you.
Here is the measurements and supplies needed to build these tables. BTW- I could not have done this without the very kind a patient guy at Home Depot. He helped me make sure we got the tables to the correct measurement. :) He sat down with me and we built each table like a puzzle before I left H.D. LOVED HIM!!!!!
My Table Measurements:
Top of tables = 24(w) x 22(h) {Measure how much space your computer needs before you start this process}Sides of tables= 19(w) x 22(h)
2x2 Bracings
4 leg Bracings & two bracings where the top and the sides of the tables meet. I suggest you do this measurement with your wood and the person helping you cut your wood. Mine were 19" & 20".
What Type of Wood Do I Use?
I purchased MDF wood. This is very strong and very smooth wood. I did not want my little ones to get splinters. The guy who helped me was able to use one sheet 49 x 97 to make all three tables. :) $25.04 for the one sheet. Not bad!
**Special Note- MDF wood can not get wet or it will warp. Keep it dry while building it. Don't worry about the wood you will protect it with a primer before you paint it.


I used scrap pieces of my MDF board for the bracing at the back of the table. Make sure you leave room for theses bracing to go inside the wood. You do not want your 2x2s to go to the edge of the table. You can see how it fits nice and snug in the pictures above.
Tools You Need:
* Screws or Nails {I had a drill and electric screw driver so I went with the screws}
* Drill or Nail Gun
* Electric Screw Driver
* Regular Screw Driver
* Clips/Bracing ( Holds the table together while you drill)
* Measuring Tape
* Some sort of measuring device to measure if your boards are level
* Dremmel (Round the corners of the desks)
* Sander
* Pencil
 Box of Screws under $5.00
***Special Note- After the tables are put together make sure you round off the corner of the table with a dremmel. This will make the tables a little less pointy and sharp if a student hits it.
Priming & Painting the Tables:
Tools & Items You Need:
1. Painter's Putty
2. Putty Knife ( I started with one, but I wound up using my finger)
3. Sander
4. towel & hair dryer (I do not own a shop vac)
5. Disposable painting tray
6. Medium to small paint roller (You can re-use this item when you paint your tables)
7. small foam edger brush.
8. Paint Stirrers (1 per color and 1 for the primer)
 Paint rollers & Kit estimated $5.00
Priming Steps:
1. You need to sand and wipe the edges of the board clean.
2. Then use painter's Putty on the edges of the boards. The pores of the wood are opened when it is cut by the saw. If is VERY difficult to paint the edges. This putty and the steps below make it MUCH easier. I started with the putty knife, but the fingers work just as good. See the pictures below.
3. Spread the wood putty on all edges of the wood, and over any nails or screws.
 Small putty jar $5.48
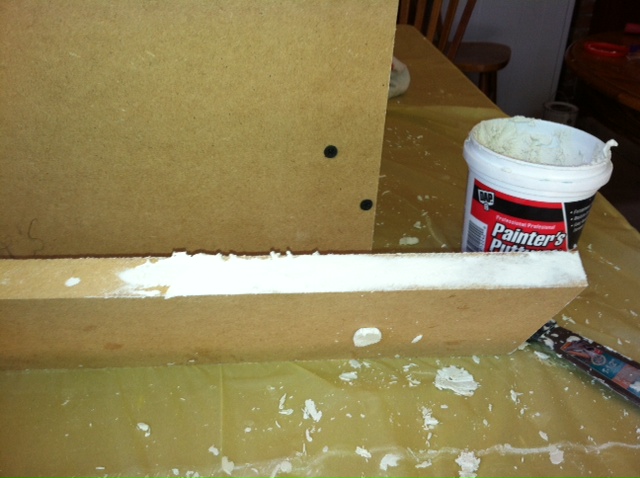

5. Wipe down or clean the sanding off of the edges. I also used a hair dryer to get all of the small pieces. I don't own a shop vac. :)
6. Now you are ready to prime.
7. Use a foam roller brush and small foam brushes for your hard to reach places. THEY CANNOT BE REUSED.
8. Allow to dry over night.
The Primer:
Your Primer CAN NOT be water based. Make sure you tell the person helping you at the paint store that your wood is MDF. I used the Zinsser product you see below. I did some research to see what primer and paint could be used on this type of wood. This was the recommended product.
 $ 17.98 gallon
Painting Your Tables:
Use new foam roller brushes and new small foam edging brushes.You can use latex paint now that you have primed the wood. It took 2 - 3 coats per table.
Allow the paint to completely dry before you do a second coat.
My Paint Colors:
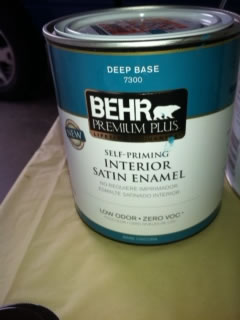 $12.58 pint
All of my paint colors were the Behr product you see above. I chose satin paint since it is easier to clean. I spent quite a bit on my paint, but I wanted the tables to match everything the was going into my room.
Teal= Peacock Feather
Lime Green= Pepper Grass
Purple= Exotic Purple
I purchased all of the above items at Home Depot.
To see how I built my crates click on the picture below.

Have you heard of this C|EH Guru.....blackhatlord@protonmail.com?
ReplyDeleteTake note of the way they all write . Oh I heard this , I tried that .. its all BULLSHIT. I used most of them with the intent of payment after Job and they all failed . They always kept on saying ooh this , need that , and just little to buy Blah Blah Blah until i met a reliable hacking god who finally helped me to increase my FICO score to that good point aside from that he'd help me with some other hacking stuff which am very proud of....You needed an answer to your cases also I suggest you try this guy.